 Right after purchasing any new iPhone, it's crucial to set it up correctly. This will allow you to use it to its full potential and understand its basic features that may have been overlooked during the purchase.
Personally, I prefer to set it up from scratch to eliminate unnecessary software and to review the device's settings again. However, paying attention to settings is also important when restoring an online or offline backup.
I'm currently setting up a new iPhone for a friend. Here are the key settings to check in the "Settings" menu:
The content of the article:
- Check iPhone Location Tracking via "Find My"
- Limit Use of Cellular Data by Your Apps
- Turn Off Notifications from Useless Apps
- Set Up Scheduled Delivery of Notifications
- Check Sound and Haptic Signals Settings
- Set a Name for Your Apple Smartphone
- Disable Background App Refresh
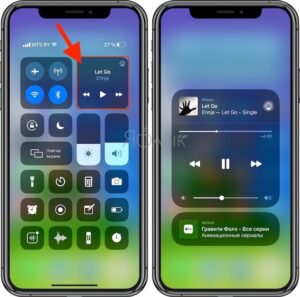
- Choose Controls for Control Center
- Adjust Display & Brightness Settings
- Choose App Locations on the Home Screen
- Configure Actions for Back Tap
- Activate Wallpaper Dimming for Dark Mode
- Limit Location Control for Apps
- Add All Necessary Cards for Apple Pay
- Manage Internet Accounts
- Set Up Incoming Calls on Other Devices
- Choose Your Preferred Safari Interface
- Immediately Select the Quality for Voice Memos
1. Set Up Data Syncing via iCloud
What to do: Go to "Settings" → Apple ID → iCloud and check the toggles being used.
First, it's important to understand which data your iPhone will sync with iCloud. Decide whether to store "Calendar" and "Reminders" entries, as well as "Notes," for access from an iPad or Mac. If not needed, these can be turned off.
During initial setup from scratch, message syncing is also disabled by default. If you're concerned about losing messages or want to view them on other devices, it's best to enable this.
An interesting new feature in this menu, introduced with iOS 15, is "Hide My Email." It allows you to create a pseudonym for your email address to avoid registering it on questionable websites.
2. Check iPhone Location Tracking via "Find My"
Activating this feature is very important.
What to do: Go to "Settings" → Apple ID → "Find My" → "Find My iPhone" and toggle it on.
Without "Find My," you won't be able to view the location of your iPhone if it's lost. If you forgot to activate this feature during the initial setup of the device, now is the right time to do it.
3. Limit Use of Cellular Data by Your Apps
I always disable more than half of the apps here — especially when abroad.
What to do: Go to "Settings" → "Cellular" and manage app access to mobile data.
This is particularly important if you have a limited mobile data plan. Once you've downloaded the necessary apps and opened each one at least once, you can restrict some from using mobile data.
By the way, this can also help increase the device's battery life. That has never been a bad thing.
4. Turn Off Notifications from Useless Apps
Notifications are usually needed for just a few apps.
What to do: Go to "Settings" → "Notifications" and check notifications for all installed apps.
After installing all the necessary software, I recommend checking this menu for unnecessary notifications.
If you don't want to receive notifications from certain apps, feel free to turn them off. It will reduce distractions.
5. Set Up Scheduled Delivery of Notifications
A very convenient feature of the new iOS.
What to do: Go to "Settings" → "Notifications" → "Scheduled Delivery" and toggle it on.
This is a new feature in iOS 15. It allows you to significantly reduce the number of distracting factors. With it, you can set a schedule for the delivery of less important notifications that you don't necessarily need to know about immediately.
For example, I personally add the "Mail" app here. I don't need to know about new emails the moment they arrive.
6. Check Sound and Haptic Signals Settings
Please don't leave the ringtone as default!
What to do: Go to "Settings" → "Sounds & Haptics" and check "Vibrate", "Ringtone", "Keyboard Clicks".
If you decide to set up your iPhone from scratch, all settings in this section will be default, including the ringtone. There have been instances where I didn't respond to the default sound, which I don't use, and missed important calls. That's why I'm warning you.
7. Set Up "Do Not Disturb" and Focus Modes
During work, I prefer to minimize the number of distractions.
What to do: Go to "Settings" → "Focus" and manage the settings for available modes.
"Focus" is a new feature in the evolution of "Do Not Disturb". It allows you to limit calls, notifications, and other activity so your smartphone doesn't distract you during professional activities or interfere with your personal life.
With "Focus", you can create a mode with restrictions for incoming calls from specific callers and messages from apps. You can set it to activate automatically or not to do so.
Manually, "Focus" modes are switched via "Control Center". This new feature has replaced "Do Not Disturb".
8. Set a Name for Your Apple Smartphone
I wonder why so few people change the name of their iPhone.
What to do: Go to "Settings" → "General" → "About" → "Name" and enter the desired name.
The name of your iPhone, for example, is used when working with the mode of a modem, and also when sharing files using AirDrop.
9. Disable Background App Refresh
Here, too, apps should be kept to a minimum.
What to do: Go to "Settings" → "Background App Refresh" and turn off unnecessary apps using the switches.
Background App Refresh is simply not needed for most installed apps. Moreover, it noticeably drains the battery of your mobile device, so there's no point in enabling this feature just like that.
10. Choose Controls for Control Center
There should also be a minimum number of apps here.
What to do: Customize as needed in "Settings" → "Control Center".
If you've decided to set up your iPhone from scratch, you'll have a basic set of toggles here. It's unlikely to suit your needs perfectly, so it's worth customizing it according to your preferences.
11. Adjust Display & Brightness Settings
Unfortunately, text size doesn't affect all software.
What to do: Check "Display & Brightness", "Auto-Lock", and "Text Size" under "Settings" → "Display & Brightness".
"Display & Brightness" allows you to switch between light and dark interface modes for the system and apps, and to set automatic switching.
I recommend setting "Auto-Lock" to the minimum (30 seconds) to increase the device's battery life.
"Text Size" helps define the font size for system menus and supporting apps. Since I don't have perfect vision, I always adjust the slider to a larger size here.
12. Choose App Locations on the Home Screen
Some prefer minimalism on their home screens.
What to do: Decide in "Settings" → "Home Screen".
This should ideally be done before the initial installation of all new software, especially when setting up an iPhone from scratch.
This feature was introduced with the release of iOS 14. Third-party apps can be left in the "App Library" to keep your home screens clutter-free. New apps can either go to the home screen or directly to the library.
13. Configure Actions for Back Tap
A highly sought-after feature.
What to do: Choose options for two and three taps under "Settings" → "Accessibility" → "Touch" → "Back Tap".
This feature has proven very convenient and is popular among users. For example, it allows you to take screenshots, lock device orientation, and even turn on the flashlight.
14. Activate Wallpaper Dimming for Dark Mode
Without this, light wallpapers may look odd.
What to do: Enable the corresponding feature under "Settings" → "Wallpaper".
This feature allows you to make any custom wallpapers for the home screen more suitable for nighttime use with your iPhone. I noticed that this feature may not activate even when restoring from backup.
15. Limit Location Control for Apps
You don't need to share your location with everyone.
What to do: Set restrictions in "Settings" → "Privacy" → "Location Services".
It doesn't make sense for all installed apps to have access to your iPhone's location, both from a privacy and battery life perspective.
The "Precise Location" toggle should only be used with software you trust 100%.
16. Add All Necessary Cards for Apple Pay
It's very convenient to pay for purchases with Apple Pay.
What to do: Simply go to "Settings" → "Wallet & Apple Pay" and add them all here.
Usually, settings for Apple's proprietary payment system are even reset after restoring data to a new iPhone from a backup.
17. Manage Internet Accounts
It's important to add all accounts for synchronization here.
What to do: Go to "Settings" → "Mail" → "Accounts" and add all necessary accounts.
Many people use Gmail or any other suitable service for syncing mail, calendars, and notes between gadgets. It's convenient if you use not only Apple gadgets but also devices from other manufacturers.
Authentication data for accounts also isn't always pulled up even when restoring a backup to a new iPhone.
18. Set Up Incoming Calls on Other Devices
I always turn off this feature myself.
What to do: Adjust the list of gadgets for this function in "Settings" → "Phone" → "Calls on Other Devices".
By default, this feature is enabled. However, I prefer not to use this feature, so my personal checklist for setting up a new iPhone includes turning off this feature.
19. Choose Your Preferred Safari Interface
I prefer the classic look.
What to do: Change the format in "Settings" → "Safari".
If you haven't used Apple smartphones for a while but decided to return to them after the iPhone 13 release, you'll be surprised by the Safari interface. You can switch it back to the familiar style with just one switch.
20. Immediately Select the Quality for Voice Memos
High quality makes it much easier to hear the interlocutor.
What to do: Choose the "Lossless" option in "Settings" → "Voice Memos" → "Audio Quality".
You may need to record something on Voice Memos at the most unexpected moment. Therefore, it's better to choose the uncompressed quality immediately so the audio is as clear as possible. This is especially true for voice memos.